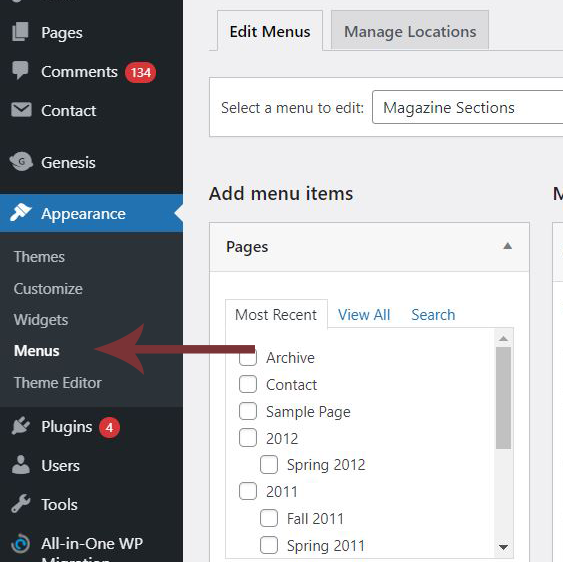
- Go to “Appearance” -> “Menu” on the left panel to open up the menu page.
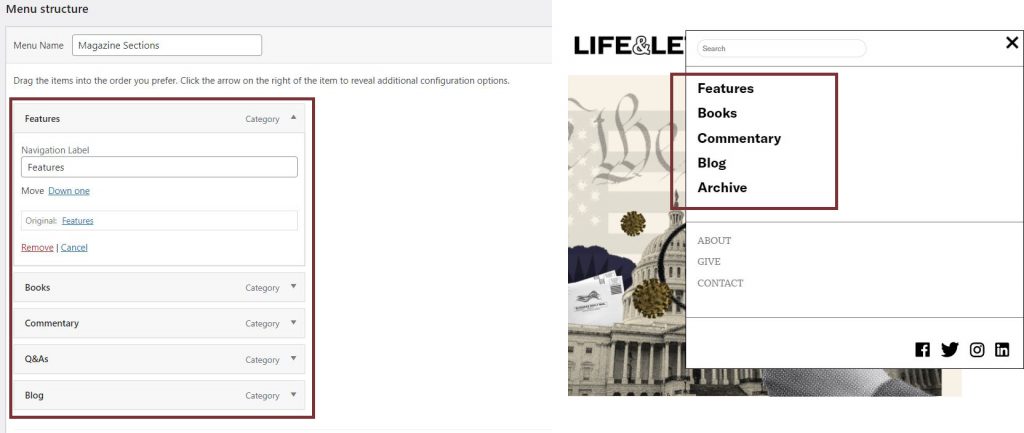
2. The elements under “Menu structure” will determine what shows up on the site menu. You can adjust the order, rename, and delete menu items from the menu here.
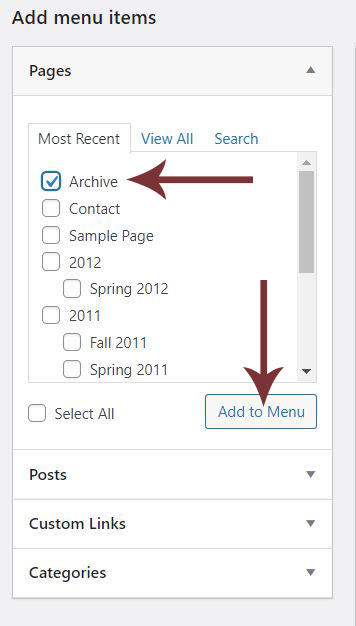
3. To add a page, a category, a link, or a post to the menu, “Add menu items” on the left and select the page, category, link, or post you would like to add and select “Add to menu.” The item will show up under Menu structure once it is added.
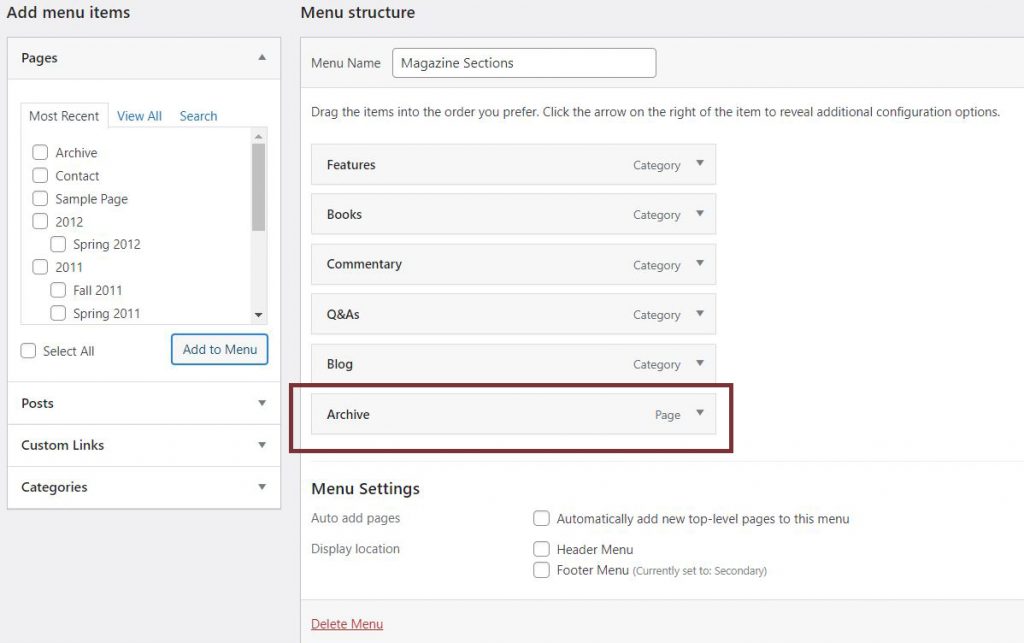
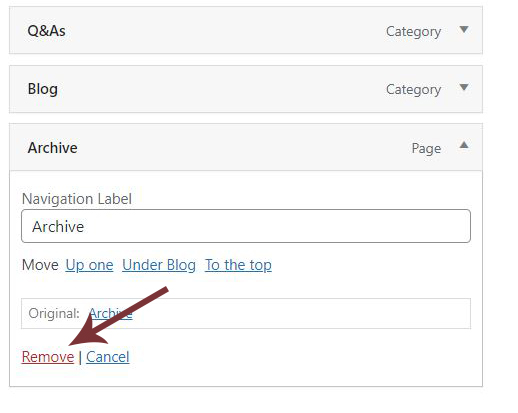
4. To remove a menu item, click on delete under the the item dropdown.
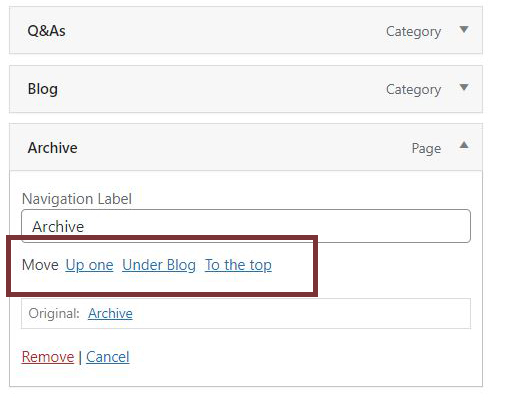
5. To adjust the order of a menu item, use the move functions under “Navigation Label.”
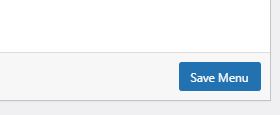
6. Click on “Save Menu” at the bottom right corner to save your changes.